# Control Statements
A programming language uses control statements to cause the flow of execution to advance and branch based on changes to the state of a program. Java’s program control statements can be put into the following categories: selection, iteration, and jump. Selection statements allow your program to choose different paths of execution based upon the outcome of an expression or the state of a variable. Iteration statements enable program execution to repeat one or more statements (that is, iteration statements form loops). Jump statements allow your program to execute in a nonlinear fashion. All of Java’s control statements are examined here.
# Selection Statements
Java supports two selection statements: if and switch. These statements allow you to control the flow of your program’s execution based upon conditions known only during run time. You will be pleasantly surprised by the power and flexibility contained in these two statements.
# if
The if statement is Java’s conditional branch statement. It can be used to route program execution through two different paths. Here is the general form of the if statement:
if (condition) statement1;
else statement2;
Here, each statement may be a single statement or a compound statement enclosed in curly braces (that is, a block). The condition is any expression that returns a boolean value. The else clause is optional.
The if works like this: If the condition is true, then statement1 is executed. Otherwise, statement2 (if it exists) is executed. In no case will both statements be executed. For example, consider the following:
int a, b;
//...
if(a < b) a = 0;
else b = 0;
Here, if a is less than b, then a is set to zero. Otherwise, b is set to zero. In no case are they both set to zero.
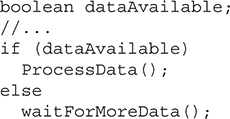
Most often, the expression used to control the if will involve the relational operators. However, this is not technically necessary. It is possible to control the if using a single boolean variable, as shown in this code fragment:
Remember, only one statement can appear directly after the if or the else. If you want to include more statements, you’ll need to create a block, as in this fragment:
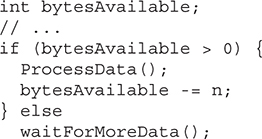
Here, both statements within the if block will execute if bytesAvailable is greater than zero.
Some programmers find it convenient to include the curly braces when using the if, even when there is only one statement in each clause. This makes it easy to add another statement at a later date, and you don’t have to worry about forgetting the braces. In fact, forgetting to define a block when one is needed is a common cause of errors. For example, consider the following code fragment:
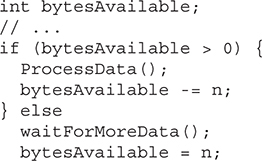
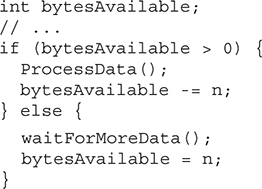
It seems clear that the statement bytesAvailable = n; was intended to be executed inside the else clause, because of the indentation level. However, as you recall, whitespace is insignificant to Java, and there is no way for the compiler to know what was intended. This code will compile without complaint, but it will behave incorrectly when run. The preceding example is fixed in the code that follows:
# Nested ifs
A nested if is an if statement that is the target of another if or else. Nested ifs are very common in programming. When you nest ifs, the main thing to remember is that an else statement always refers to the nearest if statement that is within the same block as the else and that is not already associated with an else. Here is an example:
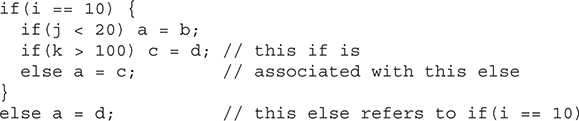
As the comments indicate, the final else is not associated with if(j<20) because it is not in the same block (even though it is the nearest if without an else). Rather, the final else is associated with if(i==10). The inner else refers to if(k>100) because it is the closest if within the same block.
# The if-else-if Ladder
A common programming construct that is based upon a sequence of nested ifs is the if-else-if ladder. It looks like this:
if(condition)
statement;
else if(condition)
statement;
else if(condition)
statement;
.
.
.
else
statement;
The if statements are executed from the top down. As soon as one of the conditions controlling the if is true, the statement associated with that if is executed, and the rest of the ladder is bypassed. If none of the conditions is true, then the final else statement will be executed. The final else acts as a default condition; that is, if all other conditional tests fail, then the last else statement is performed. If there is no final else and all other conditions are false, then no action will take place.
Here is a program that uses an if-else-if ladder to determine which season a particular month is in.
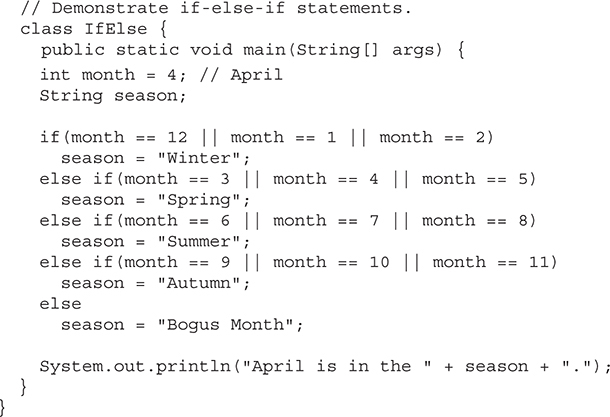
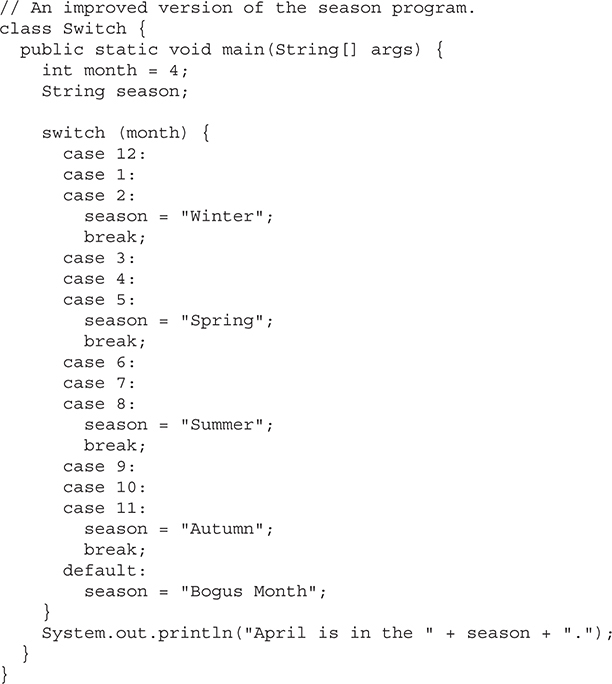
Here is the output produced by the program:
April is in the Spring.
You might want to experiment with this program before moving on. As you will find, no matter what value you give month, one and only one assignment statement within the ladder will be executed.
# The Traditional switch
The switch statement is Java’s multiway branch statement. It provides an easy way to dispatch execution to different parts of your code based on the value of an expression. As such, it often provides a better alternative than a large series of if-else-if statements.
At the outset, it is necessary to state that beginning with JDK 14, the switch has been significantly enhanced and expanded with several new features that go far beyond its traditional form. The traditional form of switch has been part of Java from the beginning and is, therefore, in widespread use. Furthermore, it is the form that will work in all Java development environments and for all readers. Because of the substantial nature of the recent switch enhancements, in the context of other recent additions to Java. Here, the traditional form of the switch is examined. Here is the general form of a traditional switch statement:
switch (expression) {
  case value1:
      // statement sequence
      break;
  case value2:
      // statement sequence
      break;
.
.
.
  case valueN :
      // statement sequence
      break;
  default:
     // default statement sequence
}
For versions of Java prior to JDK 7, expression must resolve to type byte, short, int, char, or an enumeration. Today, expression can also be of type String. Each value specified in the case statements must be a unique constant expression (such as a literal value). Duplicate case values are not allowed. The type of each value must be compatible with the type of expression.
The traditional switch statement works like this: The value of the expression is compared with each of the values in the case statements. If a match is found, the code sequence following that case statement is executed. If none of the constants matches the value of the expression, then the default statement is executed. However, the default statement is optional. If no case matches and no default is present, then no further action is taken.
The break statement is used inside the switch to terminate a statement sequence. When a break statement is encountered, execution branches to the first line of code that follows the entire switch statement. This has the effect of “jumping out” of the switch.
Here is a simple example that uses a switch statement:
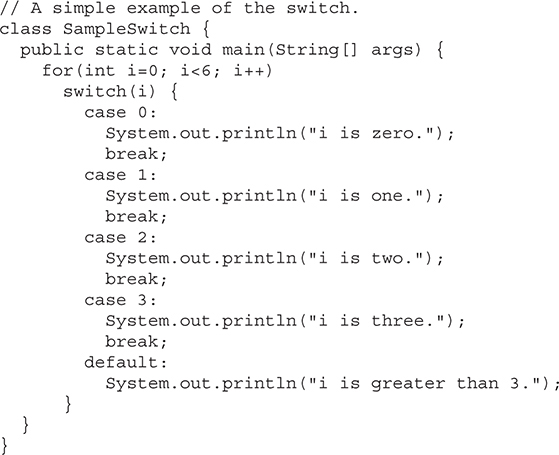
The output produced by this program is shown here:
i is zero.
i is one.
i is two.
i is three.
i is greater than 3.
i is greater than 3.
As you can see, each time through the loop, the statements associated with the case constant that matches i are executed. All others are bypassed. After i is greater than 3, no case statements match, so the default statement is executed.
The break statement is optional. If you omit the break, execution will continue on into the next case. It is sometimes desirable to have multiple cases without break statements between them. For example, consider the following program:
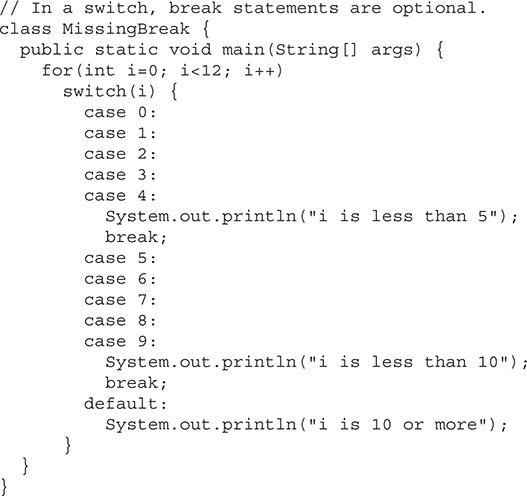
This program generates the following output:
i is less than 5
i is less than 5
i is less than 5
i is less than 5
i is less than 5
i is less than 10
i is less than 10
i is less than 10
i is less than 10
i is less than 10
i is 10 or more
i is 10 or more
As you can see, execution falls through each case until a break statement (or the end of the switch) is reached.
While the preceding example is, of course, contrived for the sake of illustration, omitting the break statement has many practical applications in real programs. To sample its more realistic usage, consider the following rewrite of the season example shown earlier. This version uses a switch to provide a more efficient implementation.
As mentioned, you can also use a string to control a switch statement. For example,
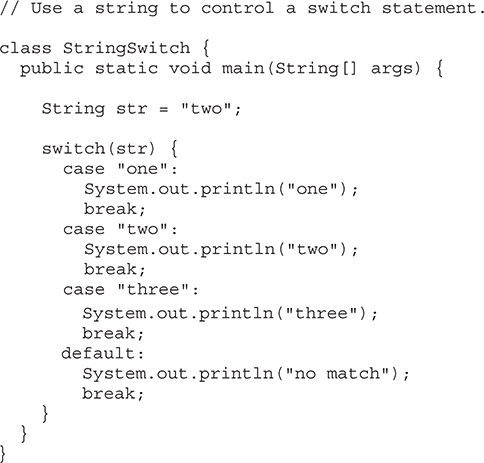
As you would expect, the output from the program is
two
The string contained in str (which is "two" in this program) is tested against the case constants. When a match is found (as it is in the second case), the code sequence associated with that sequence is executed.
Being able to use strings in a switch statement streamlines many situations. For example, using a string-based switch is an improvement over using the equivalent sequence of if/else statements. However, switching on strings can be more expensive than switching on integers. Therefore, it is best to switch on strings only in cases in which the controlling data is already in string form. In other words, don’t use strings in a switch unnecessarily.
# Nested switch Statements
You can use a switch as part of the statement sequence of an outer switch. This is called a nested switch. Since a switch statement defines its own block, no conflicts arise between the case constants in the inner switch and those in the outer switch. For example, the following fragment is perfectly valid:
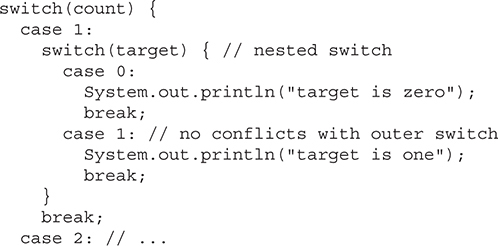
Here, the case 1: statement in the inner switch does not conflict with the case 1: statement in the outer switch. The count variable is compared only with the list of cases at the outer level. If count is 1, then target is compared with the inner list cases.
In summary, there are three important features of the switch statement to note:
- The switch differs from the if in that switch can only test for equality, whereas if can evaluate any type of Boolean expression. That is, the switch looks only for a match between the value of the expression and one of its case constants.
- No two case constants in the same switch can have identical values. Of course, a switch statement and an enclosing outer switch can have case constants in common.
- A switch statement is usually more efficient than a set of nested ifs.
The last point is particularly interesting because it gives insight into how the Java compiler works. When it compiles a switch statement, the Java compiler will inspect each of the case constants and create a “jump table” that it will use for selecting the path of execution depending on the value of the expression. Therefore, if you need to select among a large group of values, a switch statement will run much faster than the equivalent logic coded using a sequence of if-elses. The compiler can do this because it knows that the case constants are all the same type and simply must be compared for equality with the switch expression. The compiler has no such knowledge of a long list of if expressions.
Note
Recently, the capabilities and features of switch have been substantially expanded beyond those offered by the traditional switch just described.
# Iteration Statements
Java’s iteration statements are for, while, and do-while. These statements create what we commonly call loops. As you probably know, a loop repeatedly executes the same set of instructions until a termination condition is met. As you will see, Java has a loop to fit any programming need.
# while
The while loop is Java’s most fundamental loop statement. It repeats a statement or block while its controlling expression is true. Here is its general form:
while(condition) {
    // body of loop
}
The condition can be any Boolean expression. The body of the loop will be executed as long as the conditional expression is true. When condition becomes false, control passes to the next line of code immediately following the loop. The curly braces are unnecessary if only a single statement is being repeated.
Here is a while loop that counts down from 10, printing exactly ten lines of "tick":

When you run this program, it will “tick” ten times:
tick 10
tick 9
tick 8
tick 7
tick 6
tick 5
tick 4
tick 3
tick 2
tick 1
Since the while loop evaluates its conditional expression at the top of the loop, the body of the loop will not execute even once if the condition is false to begin with. For example, in the following fragment, the call to println() is never executed:

The body of the while (or any other of Java’s loops) can be empty. This is because a null statement (one that consists only of a semicolon) is syntactically valid in Java. For example, consider the following program:
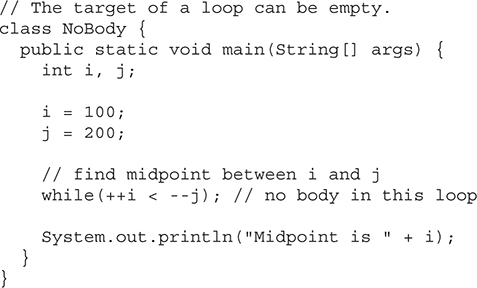
This program finds the midpoint between i and j. It generates the following output:
Midpoint is 150
Here is how this while loop works. The value of i is incremented, and the value of j is decremented. These values are then compared with one another. If the new value of i is still less than the new value of j, then the loop repeats. If i is equal to or greater than j, the loop stops. Upon exit from the loop, i will hold a value that is midway between the original values of i and j. (Of course, this procedure only works when i is less than j to begin with.) As you can see, there is no need for a loop body; all of the action occurs within the conditional expression, itself. In professionally written Java code, short loops are frequently coded without bodies when the controlling expression can handle all of the details itself.
# do-while
As you just saw, if the conditional expression controlling a while loop is initially false, then the body of the loop will not be executed at all. However, sometimes it is desirable to execute the body of a loop at least once, even if the conditional expression is false to begin with. In other words, there are times when you would like to test the termination expression at the end of the loop rather than at the beginning. Fortunately, Java supplies a loop that does just that: the do-while. The do-while loop always executes its body at least once, because its conditional expression is at the bottom of the loop. Its general form is
do {
  // body of loop
} while (condition);
Each iteration of the do-while loop first executes the body of the loop and then evaluates the conditional expression. If this expression is true, the loop will repeat. Otherwise, the loop terminates. As with all of Java’s loops, condition must be a Boolean expression.
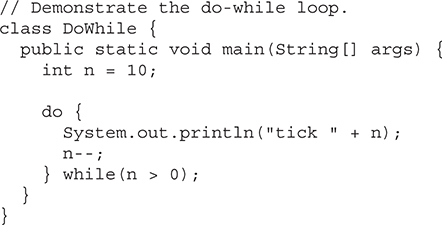
Here is a reworked version of the “tick” program that demonstrates the do-while loop. It generates the same output as before.
The loop in the preceding program, while technically correct, can be written more efficiently as follows:

In this example, the expression (––n > 0) combines the decrement of n and the test for zero into one expression. Here is how it works. First, the ––n statement executes, decrementing n and returning the new value of n. This value is then compared with zero. If it is greater than zero, the loop continues; otherwise, it terminates.
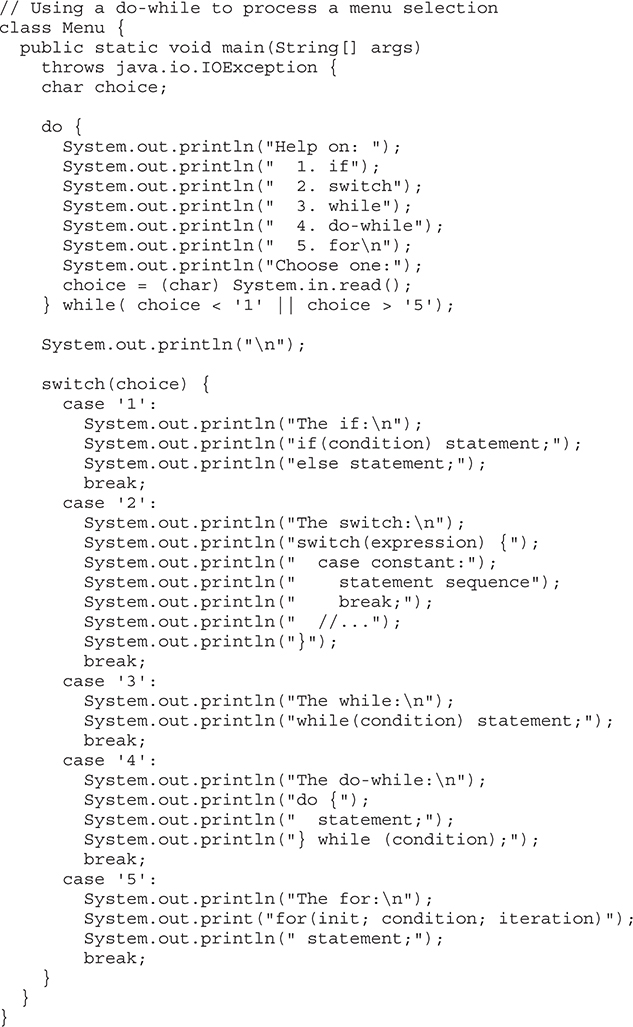
The do-while loop is especially useful when you process a menu selection, because you will usually want the body of a menu loop to execute at least once. Consider the following program, which implements a very simple help system for Java’s selection and iteration statements:
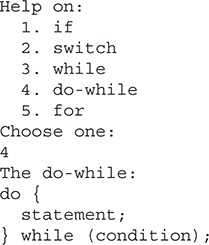
Here is a sample run produced by this program:
In the program, the do-while loop is used to verify that the user has entered a valid choice. If not, then the user is reprompted. Since the menu must be displayed at least once, the do-while is the perfect loop to accomplish this.
A few other points about this example: Notice that characters are read from the keyboard by calling System.in.read(). This is one of Java’s console input functions. System.in.read() is used here to obtain the user’s choice. It reads characters from standard input (returned as integers, which is why the return value was cast to char). By default, standard input is line buffered, so you must press ENTER before any characters that you type will be sent to your program.
Java’s console input can be a bit awkward to work with. Further, most real-world Java programs will use a graphical user interface (GUI). For these reasons, not much use of console input has been made in this book. However, it is useful in this context. One other point to consider: Because System.in.read() is being used, the program must specify the throws java.io.IOException clause. This line is necessary to handle input errors.
# for
There are two forms of the for loop. The first is the traditional form that has been in use since the original version of Java. The second is the newer “for-each” form, added by JDK 5. Both types of for loops are discussed here, beginning with the traditional form.
Here is the general form of the traditional for statement:
for(initialization; condition; iteration) {
   // body
}
If only one statement is being repeated, there is no need for the curly braces.
The for loop operates as follows. When the loop first starts, the initialization portion of the loop is executed. Generally, this is an expression that sets the value of the loop control variable, which acts as a counter that controls the loop. It is important to understand that the initialization expression is executed only once. Next, condition is evaluated. This must be a Boolean expression. It usually tests the loop control variable against a target value. If this expression is true, then the body of the loop is executed. If it is false, the loop terminates. Next, the iteration portion of the loop is executed. This is usually an expression that increments or decrements the loop control variable. The loop then iterates, first evaluating the conditional expression, then executing the body of the loop, and then executing the iteration expression with each pass. This process repeats until the controlling expression is false.
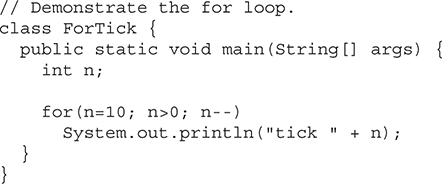
Here is a version of the “tick” program that uses a for loop:
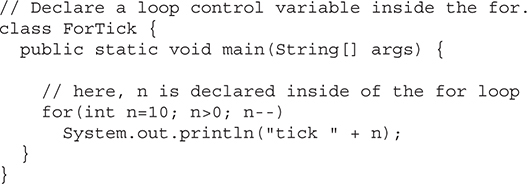
# Declaring Loop Control Variables Inside the for Loop
Often the variable that controls a for loop is needed only for the purposes of the loop and is not used elsewhere. When this is the case, it is possible to declare the variable inside the initialization portion of the for. For example, here is the preceding program recoded so that the loop control variable n is declared as an int inside the for:
When you declare a variable inside a for loop, there is one important point to remember: the scope of that variable ends when the for statement does. (That is, the scope of the variable is limited to the for loop.) Outside the for loop, the variable will cease to exist. If you need to use the loop control variable elsewhere in your program, you will not be able to declare it inside the for loop.
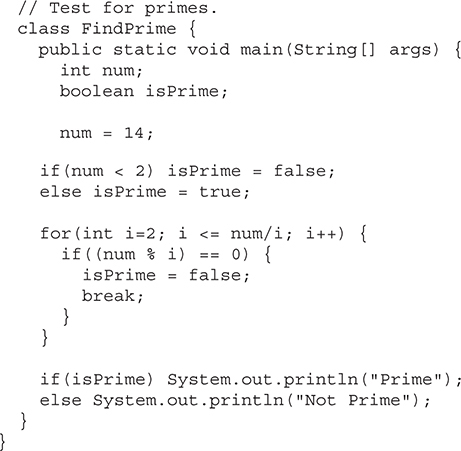
When the loop control variable will not be needed elsewhere, most Java programmers declare it inside the for. For example, here is a simple program that tests for prime numbers. Notice that the loop control variable, i, is declared inside the for since it is not needed elsewhere.
# Using the Comma
There will be times when you will want to include more than one statement in the initialization and iteration portions of the for loop. For example, consider the loop in the following program:
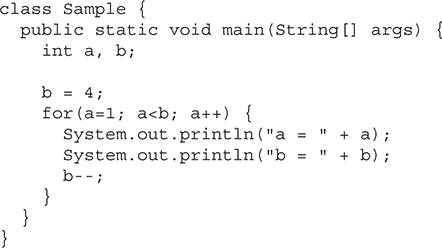
As you can see, the loop is controlled by the interaction of two variables. Since the loop is governed by two variables, it would be useful if both could be included in the for statement, itself, instead of b being handled manually. Fortunately, Java provides a way to accomplish this. To allow two or more variables to control a for loop, Java permits you to include multiple statements in both the initialization and iteration portions of the for. Each statement is separated from the next by a comma.
Using the comma, the preceding for loop can be more efficiently coded, as shown here:
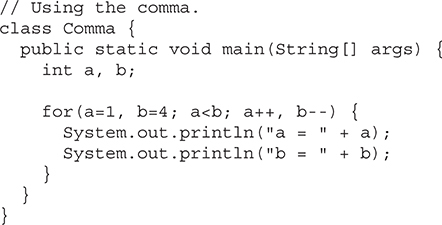
In this example, the initialization portion sets the values of both a and b. The two comma-separated statements in the iteration portion are executed each time the loop repeats. The program generates the following output:
a = 1
b = 4
a = 2
b = 3
# Some for Loop Variations
The for loop supports a number of variations that increase its power and applicability. The reason it is so flexible is that its three parts—the initialization, the conditional test, and the iteration—do not need to be used for only those purposes. In fact, the three sections of the for can be used for any purpose you desire. Let’s look at some examples.
One of the most common variations involves the conditional expression. Specifically, this expression does not need to test the loop control variable against some target value. In fact, the condition controlling the for can be any Boolean expression. For example, consider the following fragment:
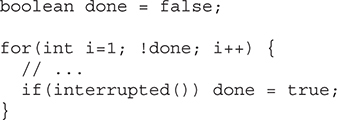
In this example, the for loop continues to run until the boolean variable done is set to true. It does not test the value of i.
Here is another interesting for loop variation. Either the initialization or the iteration expression or both may be absent, as in this next program:
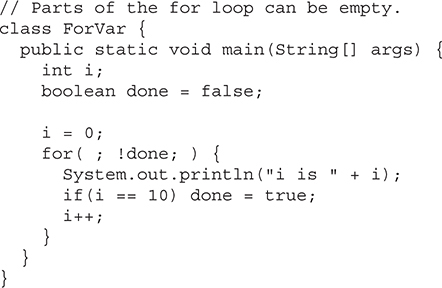
Here, the initialization and iteration expressions have been moved out of the for. Thus, parts of the for are empty. While this is of no value in this simple example—indeed, it would be considered quite poor style—there can be times when this type of approach makes sense. For example, if the initial condition is set through a complex expression elsewhere in the program or if the loop control variable changes in a nonsequential manner determined by actions that occur within the body of the loop, it may be appropriate to leave these parts of the for empty.
Here is one more for loop variation. You can intentionally create an infinite loop (a loop that never terminates) if you leave all three parts of the for empty. For example:
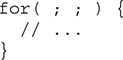
This loop will run forever because there is no condition under which it will terminate. Although there are some programs, such as operating system command processors, that require an infinite loop, most “infinite loops” are really just loops with special termination requirements. As you will soon see, there is a way to terminate a loop—even an infinite loop like the one shown—that does not make use of the normal loop conditional expression.
# The For-Each Version of the for Loop
A second form of for implements a “for-each” style loop. As you may know, contemporary language theory has embraced the for-each concept, and it has become a standard feature that programmers have come to expect. A for-each style loop is designed to cycle through a collection of objects, such as an array, in strictly sequential fashion, from start to finish. In Java, the for-each style of for is also referred to as the enhanced for loop.
The general form of the for-each version of the for is shown here:
for(type itr-var : collection) statement-block
Here, type specifies the type and itr-var specifies the name of an iteration variable that will receive the elements from a collection, one at a time, from beginning to end. The collection being cycled through is specified by collection. There are various types of collections that can be used with the for, but the only type used in this chapter is the array. (Other types of collections that can be used with the for, such as those defined by the Collections Framework, are discussed later in this book.) With each iteration of the loop, the next element in the collection is retrieved and stored in itr-var. The loop repeats until all elements in the collection have been obtained.
Because the iteration variable receives values from the collection, type must be the same as (or compatible with) the elements stored in the collection. Thus, when iterating over arrays, type must be compatible with the element type of the array.
To understand the motivation behind a for-each style loop, consider the type of for loop that it is designed to replace. The following fragment uses a traditional for loop to compute the sum of the values in an array:
int[] nums = { 1, 2, 3, 4, 5, 6, 7, 8, 9, 10 };
int sum = 0;

for(int i=0; i < 10; i++) sum += nums[i];
To compute the sum, each element in nums is read, in order, from start to finish. Thus, the entire array is read in strictly sequential order. This is accomplished by manually indexing the nums array by i, the loop control variable.
The for-each style for automates the preceding loop. Specifically, it eliminates the need to establish a loop counter, specify a starting and ending value, and manually index the array. Instead, it automatically cycles through the entire array, obtaining one element at a time, in sequence, from beginning to end. For example, here is the preceding fragment rewritten using a for-each version of the for:
int[] nums = { 1, 2, 3, 4, 5, 6, 7, 8, 9, 10 };
int sum = 0;

for(int x: nums) sum += x;
With each pass through the loop, x is automatically given a value equal to the next element in nums. Thus, on the first iteration, x contains 1; on the second iteration, x contains 2; and so on. Not only is the syntax streamlined, but it also prevents boundary errors.
Here is an entire program that demonstrates the for-each version of the for just described:
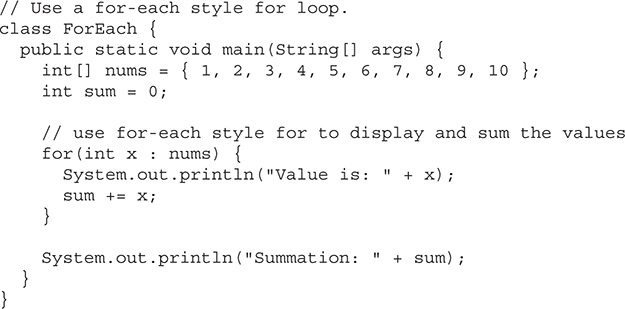
The output from the program is shown here:
Value is: 1
Value is: 2
Value is: 3
Value is: 4
Value is: 5
Value is: 6
Value is: 7
Value is: 8
Value is: 9
Value is: 10
Summation: 55
As this output shows, the for-each style for automatically cycles through an array in sequence from the lowest index to the highest.
Although the for-each for loop iterates until all elements in an array have been examined, it is possible to terminate the loop early by using a break statement. For example, this program sums only the first five elements of nums:

This is the output produced:
Value is: 1
Value is: 2
Value is: 3
Value is: 4
Value is: 5
Summation of first 5 elements: 15
As is evident, the for loop stops after the fifth element has been obtained. The break statement can also be used with Java’s other loops, and it is discussed in detail later in this chapter.
There is one important point to understand about the for-each style loop. Its iteration variable is “read-only” as it relates to the underlying array. An assignment to the iteration variable has no effect on the underlying array. In other words, you can’t change the contents of the array by assigning the iteration variable a new value. For example, consider this program:
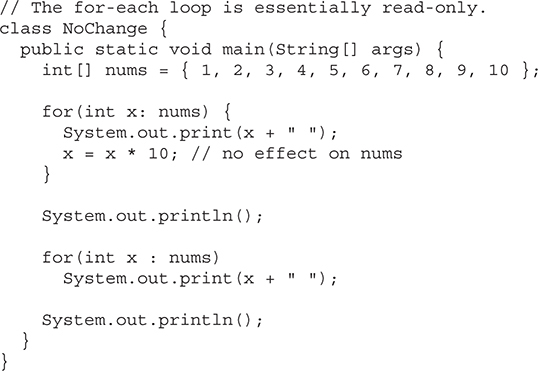
The first for loop increases the value of the iteration variable by a factor of 10. However, this assignment has no effect on the underlying array nums, as the second for loop illustrates. The output, shown here, proves this point:
1 2 3 4 5 6 7 8 9 10
1 2 3 4 5 6 7 8 9 10
# Iterating Over Multidimensional Arrays
The enhanced version of the for also works on multidimensional arrays. Remember, however, that in Java, multidimensional arrays consist of arrays of arrays. (For example, a two-dimensional array is an array of one-dimensional arrays.) This is important when iterating over a multidimensional array, because each iteration obtains the next array, not an individual element. Furthermore, the iteration variable in the for loop must be compatible with the type of array being obtained. For example, in the case of a two-dimensional array, the iteration variable must be a reference to a one-dimensional array. In general, when using the for-each for to iterate over an array of N dimensions, the objects obtained will be arrays of N–1 dimensions. To understand the implications of this, consider the following program. It uses nested for loops to obtain the elements of a two-dimensional array in row-order, from first to last.
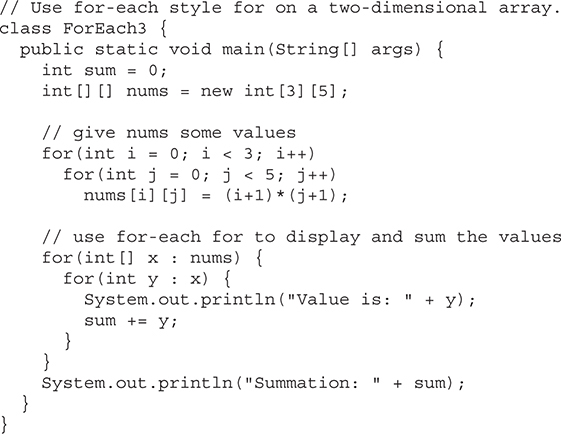
The output from this program is shown here:
Value is: 1
Value is: 2
Value is: 3
Value is: 4
Value is: 5
Value is: 2
Value is: 4
Value is: 6
Value is: 8
Value is: 10
Value is: 3
Value is: 6
Value is: 9
Value is: 12
Value is: 15
Summation: 90
In the program, pay special attention to this line:
for(int[] x: nums) {
Notice how x is declared. It is a reference to a one-dimensional array of integers. This is necessary because each iteration of the for obtains the next array in nums, beginning with the array specified by nums[0]. The inner for loop then cycles through each of these arrays, displaying the values of each element.
# Applying the Enhanced for
Since the for-each style for can only cycle through an array sequentially, from start to finish, you might think that its use is limited, but this is not true. A large number of algorithms require exactly this mechanism. One of the most common is searching. For example, the following program uses a for loop to search an unsorted array for a value. It stops if the value is found.
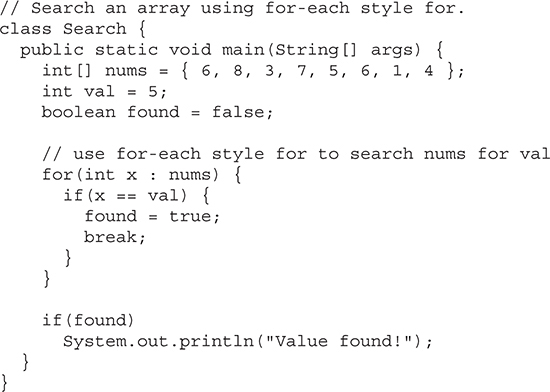
The for-each style for is an excellent choice in this application because searching an unsorted array involves examining each element in sequence. (Of course, if the array were sorted, a binary search could be used, which would require a different style loop.) Other types of applications that benefit from for-each style loops include computing an average, finding the minimum or maximum of a set, looking for duplicates, and so on.
Although we have been using arrays in the examples in this chapter, the for-each style for is especially useful when operating on collections defined by the Collections Framework. More generally, the for can cycle through the elements of any collection of objects, as long as that collection satisfies a certain set of constraints
# Local Variable Type Inference in a for Loop
JDK 10 introduced a feature called local variable type inference, which allows the type of a local variable to be inferred from the type of its initializer. To use local variable type inference, the type of the variable is specified as var and the variable must be initialized. Local variable type inference can be used in a for loop when declaring and initializing the loop control variable inside a traditional for loop, or when specifying the iteration variable in a for-each for. The following program shows an example of each case:
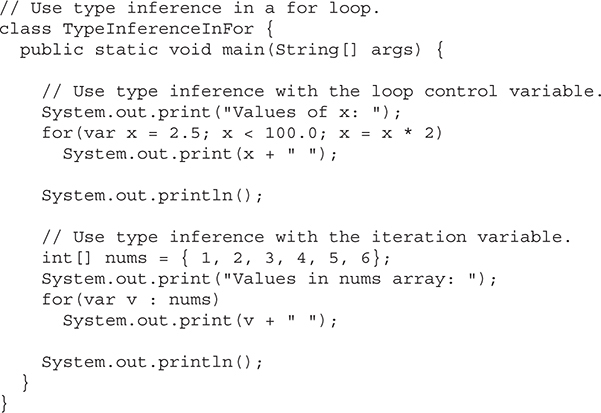
The output is shown here:
Values of x: 2.5 5.0 10.0 20.0 40.0 80.0
Values in nums array: 1 2 3 4 5 6
In this example, loop control variable x in this line:
for(var x = 2.5; x < 100.0; x = x * 2)
is inferred to be type double because that is the type of its initializer. Iteration variable v is this line:
for(var v : nums)
inferred to be of type int because that is the element type of the array nums.
One last point: Because a number of readers will be working in environments that predate JDK 10, local variable type inference will not be used by most of the for loops in the remainder of this edition of this book. You should, of course, consider it for new code that you write.
# Nested Loops
Like all other programming languages, Java allows loops to be nested. That is, one loop may be inside another. For example, here is a program that nests for loops:
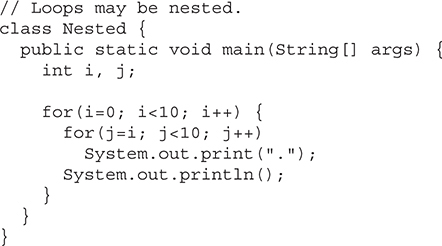
The output produced by this program is shown here:
..........
.........
........
.......
......
.....
....
...
..
.
# Jump Statements
Java supports three jump statements: break, continue, and return. These statements transfer control to another part of your program. Each is examined here.
Note
In addition to the jump statements discussed here, Java supports one other way that you can change your program’s flow of execution: through exception handling. Exception handling provides a structured method by which run-time errors can be trapped and handled by your program. It is supported by the keywords try, catch, throw, throws, and finally. In essence, the exception handling mechanism allows your program to perform a nonlocal branch.
# Using break
In Java, the break statement has three uses. First, as you have seen, it terminates a statement sequence in a switch statement. Second, it can be used to exit a loop. Third, it can be used as a “civilized” form of goto. The last two uses are explained here.
# Using break to Exit a Loop
By using break, you can force immediate termination of a loop, bypassing the conditional expression and any remaining code in the body of the loop. When a break statement is encountered inside a loop, the loop is terminated and program control resumes at the next statement following the loop. Here is a simple example:
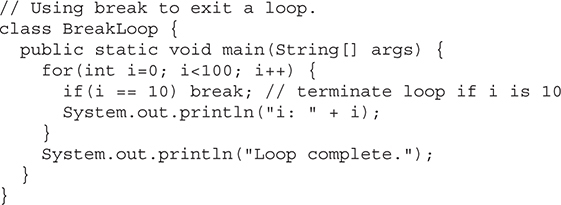
This program generates the following output:
i: 0
i: 1
i: 2
i: 3
i: 4
i: 5
i: 6
i: 7
i: 8
i: 9
Loop complete.
As you can see, although the for loop is designed to run from 0 to 99, the break statement causes it to terminate early, when i equals 10.
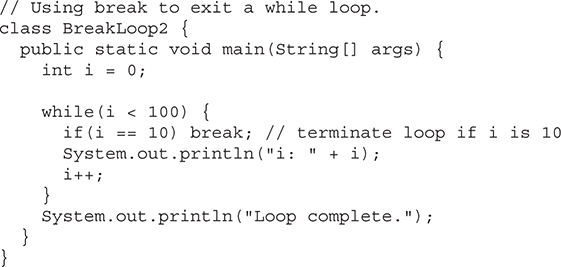
The break statement can be used with any of Java’s loops, including intentionally infinite loops. For example, here is the preceding program coded by use of a while loop. The output from this program is the same as just shown.
When used inside a set of nested loops, the break statement will only break out of the innermost loop. For example:

This program generates the following output:
Pass 0: 0 1 2 3 4 5 6 7 8 9
Pass 1: 0 1 2 3 4 5 6 7 8 9
Pass 2: 0 1 2 3 4 5 6 7 8 9
Loops complete.
As you can see, the break statement in the inner loop only causes termination of that loop. The outer loop is unaffected.
Here are two other points to remember about break. First, more than one break statement may appear in a loop. However, be careful. Too many break statements have the tendency to destructure your code. Second, the break that terminates a switch statement affects only that switch statement and not any enclosing loops.
Note
Remember break was not designed to provide the normal means by which a loop is terminated. The loop’s conditional expression serves this purpose. The break statement should be used to cancel a loop only when some sort of special situation occurs.
# Using break as a Form of Goto
In addition to its uses with the switch statement and loops, the break statement can also be employed by itself to provide a “civilized” form of the goto statement. Java does not have a goto statement because it provides a way to branch in an arbitrary and unstructured manner. This usually makes goto-ridden code hard to understand and hard to maintain. It also prohibits certain compiler optimizations. There are, however, a few places where the goto is a valuable and legitimate construct for flow control. For example, the goto can be useful when you are exiting from a deeply nested set of loops. To handle such situations, Java defines an expanded form of the break statement. By using this form of break, you can, for example, break out of one or more blocks of code. These blocks need not be part of a loop or a switch. They can be any block. Further, you can specify precisely where execution will resume, because this form of break works with a label. As you will see, break gives you the benefits of a goto without its problems.
The general form of the labeled break statement is shown here:
break label;
Most often, label is the name of a label that identifies a block of code. This can be a stand-alone block of code but it can also be a block that is the target of another statement. When this form of break executes, control is transferred out of the named block. The labeled block must enclose the break statement, but it does not need to be the immediately enclosing block. This means, for example, that you can use a labeled break statement to exit from a set of nested blocks. But you cannot use break to transfer control out of a block that does not enclose the break statement.
To name a block, put a label at the start of it. A label is any valid Java identifier followed by a colon. Once you have labeled a block, you can then use this label as the target of a break statement. Doing so causes execution to resume at the end of the labeled block. For example, the following program shows three nested blocks, each with its own label. The break statement causes execution to jump forward, past the end of the block labeled second, skipping the two println() statements.
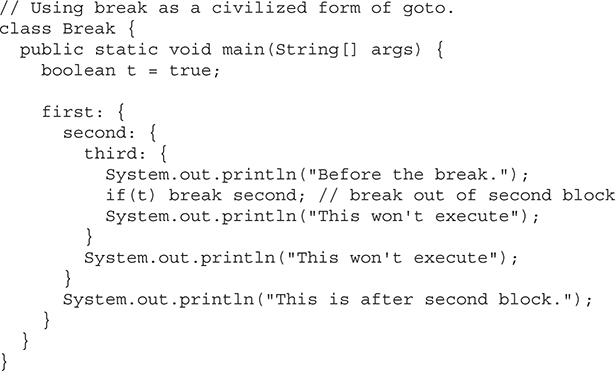
Running this program generates the following output:
Before the break.
This is after second block.
One of the most common uses for a labeled break statement is to exit from nested loops. For example, in the following program, the outer loop executes only once:
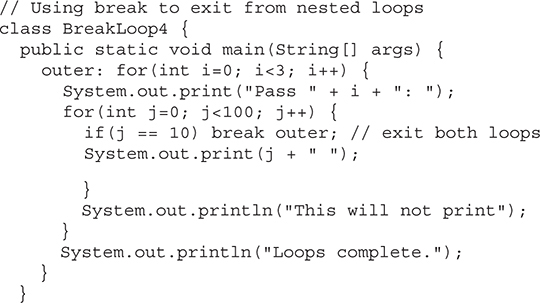
This program generates the following output:
Pass 0: 0 1 2 3 4 5 6 7 8 9 Loops complete.
As you can see, when the inner loop breaks to the outer loop, both loops have been terminated. Notice that this example labels the for statement, which has a block of code as its target.
Keep in mind that you cannot break to any label which is not defined for an enclosing block. For example, the following program is invalid and will not compile:
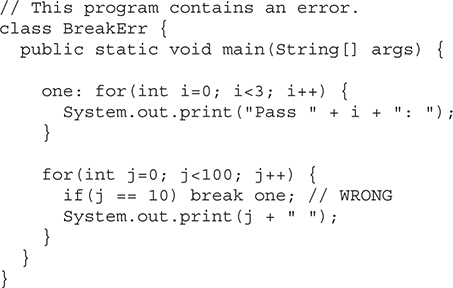
Since the loop labeled one does not enclose the break statement, it is not possible to transfer control out of that block.
# Using continue
Sometimes it is useful to force an early iteration of a loop. That is, you might want to continue running the loop but stop processing the remainder of the code in its body for this particular iteration. This is, in effect, a goto just past the body of the loop, to the loop’s end. The continue statement performs such an action. In while and do-while loops, a continue statement causes control to be transferred directly to the conditional expression that controls the loop. In a for loop, control goes first to the iteration portion of the for statement and then to the conditional expression. For all three loops, any intermediate code is bypassed.
Here is an example program that uses continue to cause two numbers to be printed on each line:
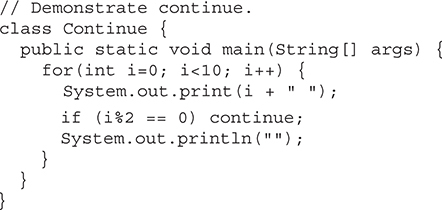
This code uses the % operator to check if i is even. If it is, the loop continues without printing a newline. Here is the output from this program:
0 1
2 3
4 5
6 7
8 9
As with the break statement, continue may specify a label to describe which enclosing loop to continue. Here is an example program that uses continue to print a triangular multiplication table for 0 through 9:
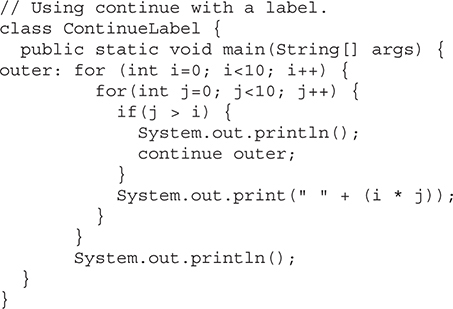
The continue statement in this example terminates the loop counting j and continues with the next iteration of the loop counting i. Here is the output of this program:
0
0 1
0 2 4
0 3 6 9
0 4 8 12 16
0 5 10 15 20 25
0 6 12 18 24 30 36
0 7 14 21 28 35 42 49
0 8 16 24 32 40 48 56 64
0 9 18 27 36 45 54 63 72 81
Good uses of continue are rare. One reason is that Java provides a rich set of loop statements which fit most applications. However, for those special circumstances in which early iteration is needed, the continue statement provides a structured way to accomplish it.
# Using return
The last control statement is return. The return statement is used to explicitly return from a method. That is, it causes program control to transfer back to the caller of the method. As such, it is categorized as a jump statement.
At any time in a method, the return statement can be used to cause execution to branch back to the caller of the method. Thus, the return statement immediately terminates the method in which it is executed. The following example illustrates this point. Here, return causes execution to return to the Java run-time system, since it is the run-time system that calls main():
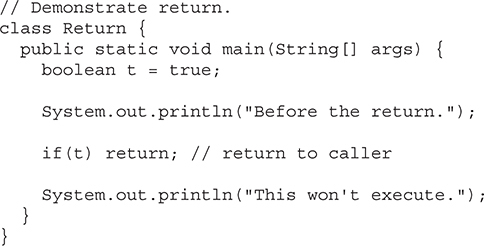
The output from this program is shown here:
Before the return.
As you can see, the final println() statement is not executed. As soon as return is executed, control passes back to the caller.
One last point: In the preceding program, the if(t) statement is necessary. Without it, the Java compiler would flag an “unreachable code” error because the compiler would know that the last println() statement would never be executed. To prevent this error, the if statement is used here to trick the compiler for the sake of this demonstration.